
Ever feel like your printer has a personal vendetta against you? One minute you’re happily clicking “print,” and the next, you’re wrestling with a mangled piece of paper, muttering under your breath. Printer jams
they’re the bane of anyone who relies on a printer. And let’s be honest, in today’s world, that’s pretty much everyone. From students to professionals, home offices to bustling workplaces, printers are essential tools. But when they decide to act up, it can bring everything to a screeching halt.
 I’ve been there. Countless times. I’ve spent hours hunched over printers, coaxing, cajoling, and sometimes even resorting to a bit of aggressive persuasion (okay, maybe more than a bit). But through the trials and tribulations, I’ve learned a few things about printer jams. And I’m here to share those hard-earned lessons with you.
The Real Reason Your Printer Jams (It’s Not Always What You Think)
Before we dive into solutions, let’s get one thing straight: printer jams aren’t just random acts of mechanical defiance. There’s almost always a reason. Understanding the root cause is the key to preventing them in the future. Here’s a breakdown of the usual suspects:
- Paper Woes: This is the most common culprit. Cheap, low-quality paper is a disaster waiting to happen. It’s often too thin, too thick, or not cut properly, leading to jams. Even good-quality paper can be a problem if it’s stored improperly and absorbs moisture, causing it to curl or stick together.
- Paper Path Obstructions: Crumbs of paper, stray staples, or even dust can block the paper’s journey through the printer. This is especially true if you print a lot of documents and aren’t regularly cleaning your printer.
- Mechanical Malfunctions: Over time, the rollers and gears that feed the paper can wear out or become misaligned. This can cause the paper to get stuck or feed unevenly.
- Environmental Factors: Extreme temperatures and humidity can affect the paper and the printer’s internal components, leading to jams.
- Incorrect Paper Settings: Using the wrong paper type settings in your printer driver can cause the printer to operate inefficiently, increasing the likelihood of a paper jam.
The good news? Most printer jams are fixable with a little patience and know-how. The bad news? Well, sometimes you have to get your hands dirty.
Step-by-Step Guide: How to Fix a Printer Jam Like a Pro
Alright, let’s get down to business. Here’s how to tackle a printer jam, step-by-step. Follow these instructions, and you’ll be back to printing in no time.
- Power Down and Unplug: Safety first! Turn off your printer and unplug it from the power outlet. This prevents any accidental electrical shocks and ensures that the printer’s components are no longer moving.
- Locate the Jam: Open all the access panels – the paper tray, the back panel, and any other doors that give you access to the paper path. Look carefully for the jammed paper. Use a flashlight if needed.
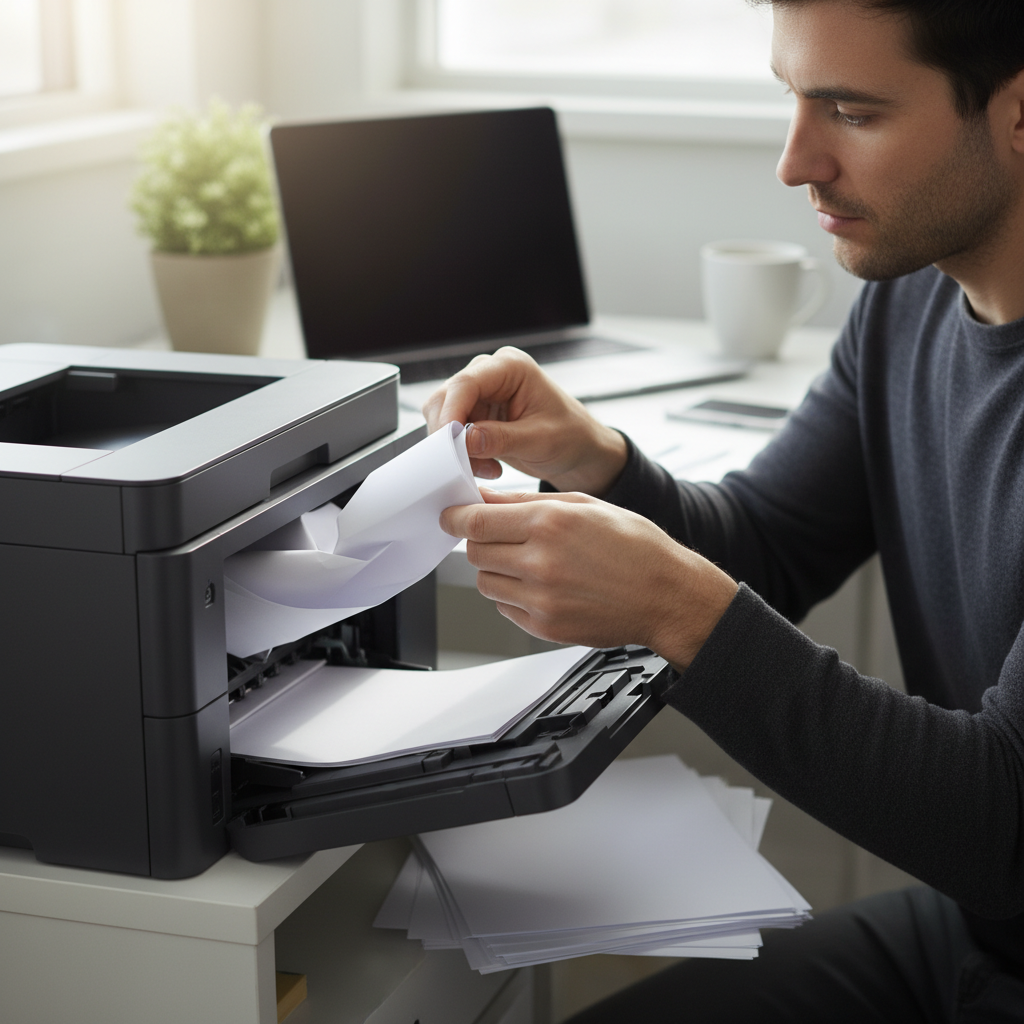
- Gently Remove the Paper: This is where you need to be patient. Grab the paper by the edges and pull it out slowly and evenly. Avoid tearing the paper, as small pieces left behind can cause further jams. If the paper is stuck tightly, try pulling it in the direction the paper normally travels.
- Check for Debris: Once you’ve removed the jammed paper, inspect the paper path for any remaining paper fragments, staples, or other obstructions. Use tweezers or a small tool to carefully remove anything that shouldn’t be there.
- Inspect the Rollers: Take a close look at the rollers that feed the paper. Are they clean and free of debris? Do they appear to be in good condition? If they’re dirty, gently wipe them with a clean, lint-free cloth.
- Reload the Paper: Make sure your paper tray is properly loaded with the correct type of paper. Fan the paper to separate the sheets, and make sure the edges are aligned.
- Close All Panels: Ensure all access panels are securely closed.
- Plug In and Power On: Plug the printer back in and turn it on.
- Print a Test Page: Once the printer is ready, print a test page to make sure the jam is cleared. If the test page prints without a problem, you’re good to go!
Advanced Troubleshooting: When the Basic Fixes Don’t Work
Sometimes, the basic steps aren’t enough. If you’re still experiencing jams after following the above instructions, here are some more advanced troubleshooting tips:
- Check the Printer Driver: Make sure you have the latest printer driver installed on your computer. Outdated drivers can sometimes cause printing problems.
- Clean the Printer: Many printers have a cleaning function in their settings. Run this function to clean the internal components. You can also manually clean the printer by wiping down accessible areas with a soft, dry cloth.
- Check the Paper Settings: Double-check the paper type and size settings in your printer driver. Make sure they match the paper you’re using.
- Examine the Fuser Unit: The fuser unit is responsible for melting the toner onto the paper in laser printers. If this unit is damaged or malfunctioning, it can cause paper jams. This is something that you likely won’t be able to fix yourself and may need professional assistance.
- Contact Technical Support: If all else fails, it’s time to call in the experts. Contact the printer manufacturer’s technical support or take your printer to a qualified repair shop.
Common Mistakes to Avoid When Dealing With Printer Jams
We’ve all been there. Frustration sets in, and we start making mistakes that only make the problem worse. Here are some common blunders to avoid:
- Forcing the Paper: Never yank the paper out forcefully. This can tear the paper and leave fragments behind, making the jam even worse.
- Using the Wrong Tools: Avoid using sharp objects, such as knives or screwdrivers, to remove jammed paper. You could damage the printer’s internal components.
- Ignoring the Warning Lights: Pay attention to the printer’s warning lights and error messages. These provide valuable clues about the location and cause of the jam.
- Neglecting Regular Maintenance: Failing to clean and maintain your printer regularly increases the likelihood of jams.
- Using the Wrong Paper: Using paper that is too thin, thick, or the wrong type for your printer is a frequent problem.
Printer Jam Myths Debunked
There’s a lot of misinformation out there about printer jams. Let’s separate fact from fiction:
- Myth: “The printer is just old and needs to be replaced.” Reality: Many printer jams can be fixed, regardless of the printer’s age. Regular maintenance is often the key.
- Myth: “Only expensive printers are reliable.” Reality: The reliability of a printer depends more on its design, build quality, and maintenance than on its price.
- Myth: “You can always fix a paper jam yourself.” Reality: While you can fix most jams, some may require professional assistance, especially if internal components are damaged.
- Myth: “Using generic printer paper will always lead to jams.” Reality: While the quality of paper can affect printer jams, generic paper can work just fine if it’s the correct type and weight for your printer.
Preventing Future Printer Jams: Proactive Measures
The best way to deal with printer jams is to prevent them in the first place. Here are some tips to keep your printer running smoothly:
- Use High-Quality Paper: Invest in good-quality paper that is designed for your printer.
- Store Paper Properly: Store paper in a dry place to prevent it from absorbing moisture.
- Load Paper Correctly: Fan the paper before loading it into the paper tray, and make sure the edges are aligned.
- Clean Your Printer Regularly: Dust and debris can accumulate in your printer over time. Clean the printer regularly, following the manufacturer’s instructions.
- Update Your Printer Driver: Keep your printer driver up to date to ensure optimal performance.
- Avoid Overloading the Paper Tray: Don’t overload the paper tray. It’s better to add paper frequently than to jam the tray with too much paper.
- Choose the Right Paper Type: Match the paper settings to the paper you are using. This helps your printer function more efficiently.
Expected Results and Timeline
Fixing a printer jam can usually be done within a few minutes, depending on the severity of the jam. If you follow the step-by-step instructions, you should be able to get your printer back up and running quickly. More complex issues or damage to internal components may require more time and professional assistance.
By implementing preventative measures, you can significantly reduce the frequency of jams and ensure your printer operates reliably. Remember, a little bit of proactive care goes a long way. This includes maintaining your printer, and also taking care of your own well being by avoiding distractions and staying focused, which you can read about in this article on how to master focus and get more done.
Frequently Asked Questions About Printer Jams
Here are some frequently asked questions that people often search for when encountering printer issues:
- Why does my printer keep jamming? The most common causes are paper problems, paper path obstructions, mechanical issues, environmental factors (humidity), and incorrect paper settings.
- How do I remove a jammed paper from my printer? Power down and unplug the printer. Locate the jam, open all access panels, and gently remove the paper in the direction it normally travels. Inspect for debris.
- Can I use any type of paper in my printer? No. It’s important to use the correct type and weight of paper recommended for your printer. Using the wrong paper can lead to jams and poor print quality.
- What should I do if my printer keeps jamming after I remove the paper? Check the paper path for small paper fragments or other obstructions. Clean the rollers and try a different type of paper. Make sure your printer settings match the paper you’re using. If that doesn’t work, there may be internal damage that requires professional attention.
- How often should I clean my printer? It depends on how frequently you use your printer, but cleaning it at least every few months is a good practice. If you print a lot, you may need to clean it more often. Refer to your printer’s manual for specific cleaning instructions.
- Can humidity cause printer jams? Yes. High humidity can cause paper to absorb moisture, leading to curling, sticking, and jams.
- Should I buy a new printer if it keeps jamming? Not necessarily. Many printer jams are fixable. Try the troubleshooting steps outlined in this article first. If the problem persists despite your best efforts, then it may be time to consider a replacement.
- How can I prevent printer jams in the future? Use high-quality paper, store paper properly, load paper correctly, clean your printer regularly, keep your drivers up to date, avoid overloading the paper tray, and always select the correct paper type in the printer settings.
Printer jams can be frustrating, but they don’t have to ruin your day. With a little knowledge and patience, you can usually resolve the issue quickly and get back to printing. Remember to follow these steps and take preventative measures to keep your printer running smoothly. For more tips on improving your workflow and productivity, visit RelyOwn.