
Ever looked at a frosty pint of craft beer and thought, “I could do that”? You’re not alone. The world of homebrewing is more accessible than ever, offering a rewarding hobby that combines science,
creativity, and, of course, delicious results. Forget those intimidating stories of complex equipment and precise measurements; brewing your own beer at home is entirely achievable, even for a complete beginner.
This guide will take you from the raw ingredients to your first satisfying sip, demystifying the process and equipping you with the practical knowledge to brew like a pro.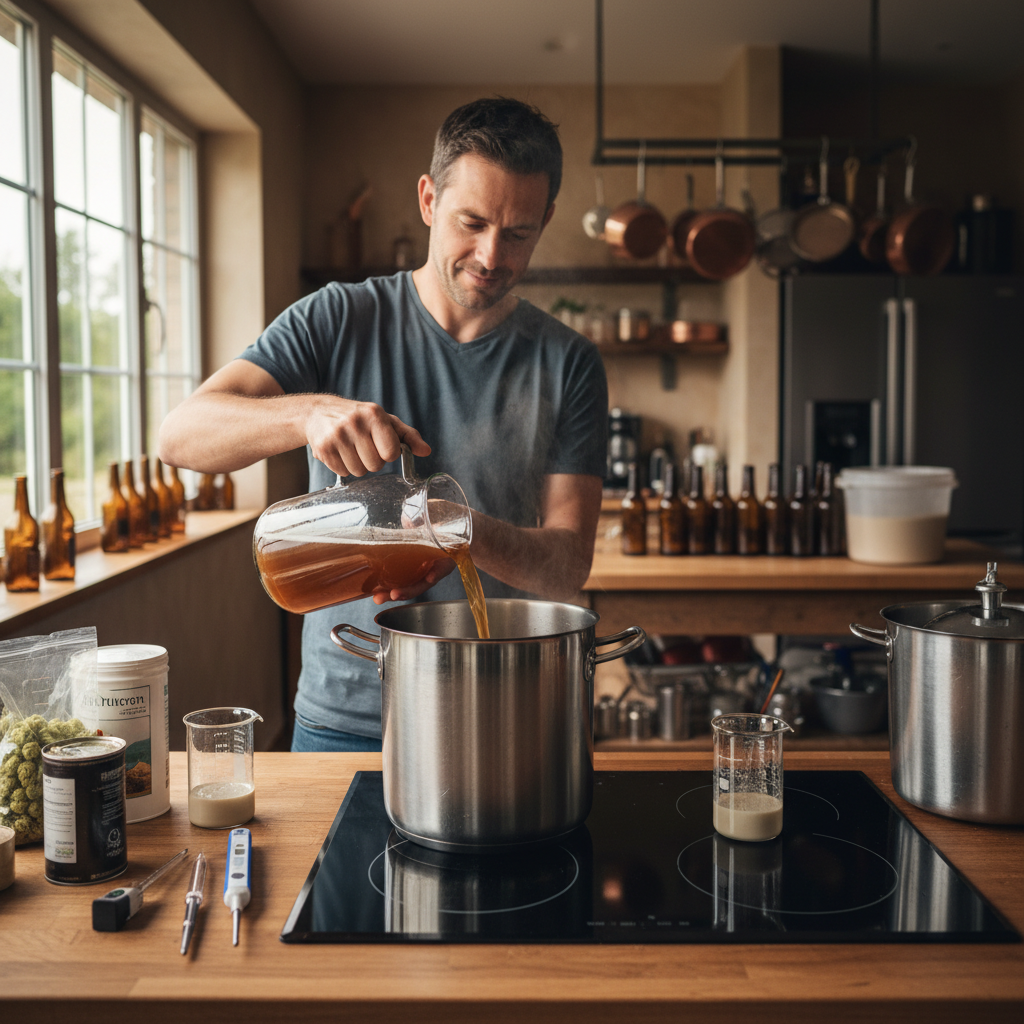 The allure of homebrewing goes beyond just saving a few bucks on your favorite IPA. It’s about the journey of creation, the satisfaction of turning simple ingredients –
water, malted barley, hops, and yeast – into a complex beverage. It’s about understanding the alchemy that happens in your brew kettle and fermenter. Many beginners envision needing a full-blown brewery setup in their garage, but that’s a common misconception. With a few key pieces of equipment and a solid understanding of the process, you can brew fantastic beer right in your kitchen.
Why Brew Your Own Beer? The Tangible and Intangible Rewards
Before we dive into the nitty-gritty, let’s talk about *why* this is such a fantastic pursuit.
- Cost-Effectiveness: While the initial investment in equipment exists, brewing in batches quickly becomes more economical than constantly buying craft beer.
- Unparalleled Customization: You are the master brewer. Want a hoppier pale ale? A malty stout with a hint of chocolate? You can tweak recipes to your exact taste preferences.
- The Joy of Creation: There’s an immense sense of accomplishment in serving a beer you brewed yourself, knowing you transformed humble ingredients into a delightful beverage.
- Learning and Community: Homebrewing is a continuous learning process, and there’s a vibrant, supportive community of fellow brewers eager to share knowledge and passion.
- A Unique Social Outlet: Brewing can be a social activity, and sharing your creations with friends and family is incredibly rewarding.
Understanding the Brewing Process: The Big Picture
At its core, brewing beer involves a few fundamental stages:
- Mashing: Converting starches in malted barley into fermentable sugars.
- Boiling: Adding hops for bitterness, flavor, and aroma, and sanitizing the wort (the sugary liquid).
- Fermentation: Yeast consumes the sugars, producing alcohol and carbon dioxide.
- Packaging: Carbonating and bottling or kegging the finished beer.
This might sound technical, but don’t worry. We’ll break down each step into manageable actions.
Getting Started: Essential Equipment for the Budding Brewer
Let’s talk gear. You don’t need to break the bank to start. A basic “brew in a bag” (BIAB) or extract brewing setup is perfect for beginners.
The Core Equipment Checklist:
- Brew Kettle: A large pot (at least 5 gallons, preferably 7-8 gallons for a 5-gallon batch) made of stainless steel. This is where the magic begins.
- Fermenter: A food-grade plastic bucket or a glass carboy (usually 6.5 gallons for a 5-gallon batch) where your yeast will work its wonders. Plastic is lighter and less prone to breakage, while glass offers better visibility and is less susceptible to oxygen ingress.
- Airlock and Stopper/Grommet: Essential for allowing CO2 to escape during fermentation without letting in unwanted air or contaminants.
- Sanitizer: This is non-negotiable. Star San is a popular choice for its no-rinse properties. EVERYTHING that touches your beer after the boil MUST be sanitized. Seriously, this is where most beginners mess up.
- Long-Handled Spoon or Paddle: For stirring your mash and wort. Stainless steel or heat-resistant plastic is ideal.
- Thermometer: An accurate thermometer is crucial for mash temperature control. A digital instant-read thermometer is highly recommended.
- Hydrometer and Test Jar: To measure the specific gravity (sugar content) of your wort before and after fermentation, allowing you to calculate your beer’s alcohol content.
- Siphon Tubing and Racking Cane: For transferring your beer from the fermenter to a bottling bucket or keg, leaving the sediment behind.
- Bottling Bucket (Optional but Recommended): A separate bucket with a spigot to make bottling easier.
- Bottles and Caps: Clean, reusable glass bottles and crown caps. Or, consider a kegging system if you plan to brew frequently.
- Bottle Filler and Capper: Tools to easily fill bottles and seal them with caps.
- Cleaning Brushes: For scrubbing your equipment.
A word on sanitization: I can’t stress this enough. Imagine you’ve brewed a beautiful wort, pitched your yeast, and everything is going perfectly. Then, a rogue bacterium or wild yeast decides to throw a party in your fermenter. The result? Off-flavors, vinegar, or worse, a completely undrinkable batch. Always, always, always sanitize everything that touches your beer post-boil. Think of it as giving your beer its own personal spa treatment before it goes into hibernation.
Choosing Your First Beer: Extract Brewing vs. All-Grain
For your first few batches, I highly recommend starting with **extract brewing**. This method uses malt extract, a concentrated syrup or powder made from malted barley, which simplifies the mashing process. You’re essentially skipping the most time-consuming step and focusing on the boil, fermentation, and packaging.
Extract Brewing Simplified:
- Steeping Grains (Optional but Adds Complexity): You can steep specialty grains in hot water to add color and flavor, mimicking some aspects of all-grain brewing.
- Boiling the Wort: Dissolve your malt extract in water and bring it to a boil.
- Hop Additions: Add hops at specific times during the boil for bitterness, flavor, and aroma.
- Cooling: Rapidly cool the wort to yeast pitching temperature.
- Fermentation: Pitch your yeast and let it do its magic.
- Packaging: Bottle or keg your beer.
Once you’re comfortable with extract brewing and want to dive deeper, you can transition to **all-grain brewing**. This involves doing the mashing yourself, giving you complete control over the malt bill and the brewing process. It’s more involved but incredibly rewarding for those who want to truly master the craft.
Step-by-Step: Your First Extract Brew Day
Let’s get practical. We’ll walk through a typical extract brew day, aiming for a simple, delicious Pale Ale.
Before Brew Day: Preparation is Key
The day before brew day, you’ll want to do a few things:
- Gather your ingredients: Malt extract (liquid or dry), hops, yeast, priming sugar (for bottling).
- Clean and Sanitize: Thoroughly clean your fermenter, airlock, stopper, stirring spoon, thermometer, and anything else that will touch the wort after the boil. Then, sanitize them according to the sanitizer’s instructions. Trust me, an ounce of prevention is worth a gallon of spoiled beer.
- Prepare your yeast: If using dry yeast, rehydrate it according to package directions. If using liquid yeast, ensure it’s at room temperature.
- Chill your water: Have about 2-3 gallons of cool water ready in your refrigerator to help cool the wort quickly.
Brew Day: The Main Event
Here’s a play-by-play. I’ll use a 5-gallon batch size as a reference.
Step 1: Heating Your Water (The Strike Water)
Fill your brew kettle with about 2.5-3 gallons of water. Heat this water to the temperature specified in your recipe for steeping grains (if applicable). For a simple extract beer, you might just bring it to a boil.
Step 2: Steeping Grains (If Your Recipe Calls For It)
If your recipe includes specialty grains, place them in a grain bag. Once your water reaches the correct temperature (usually around 150-165°F or 65-74°C), turn off the heat, add the grain bag, and let it steep for about 20-30 minutes. Think of this as making a strong, malty tea. Don’t squeeze the bag excessively, as this can extract tannins that cause astringency. Remove the grain bag and let it drip. You can discard the grains.
Step 3: Adding the Malt Extract and Bringing to a Boil
Carefully stir in your malt extract (liquid or dry). Make sure it’s fully dissolved. This is your wort – the sugary liquid that yeast will ferment. Now, bring this mixture to a rolling boil. This is a critical step for sanitization and hop utilization. Watch out for boil-overs! As the wort heats up, it can foam and spill over the top of the kettle. Keep a spray bottle of sanitizer handy to spray the foam, which often helps it subside, or be ready to reduce the heat temporarily. Many people find this a nerve-wracking part of the brew day. My advice? Have a large spoon or paddle ready and pay close attention.
Step 4: The Boil and Hop Additions
Once you have a rolling boil, start your 60-minute timer. This is where the hops come in. Your recipe will specify hop additions at different times. For example:
- Bittering Hops: Added at the beginning of the boil (e.g., 60 minutes remaining). These hops provide the beer’s bitterness.
- Flavor Hops: Added later in the boil (e.g., 15-20 minutes remaining). These contribute hop flavor.
- Aroma Hops: Added near the end of the boil or even after flame-out (e.g., 5 minutes or 0 minutes remaining). These release volatile oils that contribute aroma.
Follow your recipe precisely. Adding hops at the right time is crucial for the desired bitterness, flavor, and aroma profile. This is where the hop character of your beer is born.
Step 5: Cooling the Wort
Once the 60-minute boil is complete, you need to cool the wort as quickly as possible down to yeast pitching temperature (typically 65-75°F or 18-24°C, depending on the yeast strain). Rapid cooling is essential to prevent off-flavors caused by bacteria and to encourage a good “cold break” – a protein haze that settles out, resulting in a clearer beer. The most common methods are using an immersion chiller (a coil of copper or stainless steel that you run cold water through) or an ice bath (placing the kettle in a sink or tub filled with ice water). This cooling phase is often the most physically demanding part of brew day. Don’t be afraid to get your hands dirty (but remember to sanitize them!).
Step 6: Transferring to the Fermenter and Pitching Yeast
Once the wort is cooled, carefully transfer it to your sanitized fermenter. Try to aerate the wort as you transfer by splashing it or using a sanitized aeration stone. Yeast needs oxygen to reproduce initially. Once the wort is in the fermenter, add your sanitized yeast. If you’re using dry yeast, you might have rehydrated it earlier. If using liquid yeast, you can often just pour it in. Seal the fermenter with your sanitized stopper and airlock (filled with sanitizer or vodka).
Step 7: Fermentation – The Waiting Game
Place the fermenter in a cool, dark place with a stable temperature. This is where the yeast gets to work, consuming sugars and producing alcohol and CO2. You should see activity in the airlock within 12-72 hours – bubbles escaping as CO2 is produced. This is the most passive part of the process, but crucial. Resist the urge to open the fermenter! Let the yeast do its job undisturbed for 1-2 weeks, depending on the beer style and yeast strain. You can take gravity readings with your hydrometer to track fermentation progress. A stable reading over a couple of days indicates fermentation is complete.
Step 8: Packaging – Bottling or Kegging
Once fermentation is complete, it’s time to package your beer. For beginners, bottling is the most common method.
- Sanitize Everything: Clean and sanitize your bottling bucket, siphon, tubing, bottle filler, bottles, and caps.
- Prepare Priming Sugar: Dissolve a specific amount of priming sugar (corn sugar/dextrose is common) in a small amount of boiling water, then cool it. This sugar will provide the carbonation in your bottles.
- Transfer Beer: Gently siphon the beer from the fermenter into the bottling bucket, leaving the yeast sediment (trub) behind. Add the cooled priming sugar solution to the bottling bucket and gently stir to distribute it evenly without introducing too much oxygen.
- Fill Bottles: Use the bottle filler to fill each sanitized bottle, leaving about an inch of headspace at the top.
- Cap Bottles: Use your bottle capper to securely attach the sanitized caps.
Let the bottles condition at room temperature for 2-3 weeks. During this time, the remaining yeast will consume the priming sugar, creating CO2 and carbonating your beer naturally.
Common Mistakes and How to Avoid Them
Even with the best intentions, mistakes happen. Here are a few common pitfalls for new brewers:
- Poor Sanitation: As we’ve discussed, this is the #1 killer of homebrew batches. Be meticulous.
- Temperature Swings During Fermentation: Yeast is sensitive. Big temperature fluctuations can stress the yeast, leading to off-flavors (like fusel alcohols or esters that taste like nail polish remover). Keep your fermenter in a stable environment.
- Not Enough Oxygen at Pitching: Yeast needs oxygen to reproduce healthily. Ensure you aerate your wort sufficiently before pitching.
- Oxidation After Fermentation: Once fermentation is complete, beer is susceptible to oxidation, which can lead to stale, cardboard-like flavors. Handle your beer gently during transfers and bottling. Minimize splashing.
- Impatience: Homebrewing requires patience. Rushing fermentation or packaging will likely result in a subpar beer. Let it take the time it needs.
I remember my first batch. I was so excited to bottle it after just a week of fermentation. The result? Flat beer with a weird, tangy taste. I learned the hard way that fermentation needs its full two weeks, and bottle conditioning takes time. It’s a lesson many brewers learn – sometimes through delicious, albeit imperfect, experience. If you skip the crucial conditioning time, problems start later, and you’ll be left with a disappointing beverage instead of a triumph.
Beyond the Basics: Improving Your Brews
Once you’ve mastered extract brewing, you might want to elevate your game.
- All-Grain Brewing: As mentioned, this gives you ultimate control.
- Water Chemistry: Adjusting the mineral content of your brewing water can dramatically impact the flavor profile of your beer.
- Yeast Management: Learning to harvest and re-pitch yeast, or making your own yeast starters, can improve fermentation health and consistency.
- Experimenting with Hops and Malts: Explore different hop varieties and malt profiles to create unique beers.
- Cold Crashing: Chilling your beer post-fermentation before packaging can help clarify it.
The real difference comes when you start to understand how each ingredient and process affects the final outcome. It’s a journey of continuous learning and refinement.
Modern Brewing Environment (2025-2026)
In today’s brewing landscape, access to information and specialized ingredients is better than ever. Online forums, dedicated homebrew shops, and readily available recipe kits make starting incredibly easy. The trend is towards more refined techniques, including advanced water chemistry adjustments and a deeper understanding of yeast strains. Even with the plethora of commercial craft beers available, the personal satisfaction and unique flavors achievable through homebrewing continue to attract new enthusiasts. Tools like smart fermenter controllers and advanced brewing software are also becoming more accessible, allowing for greater precision and consistency.
Frequently Asked Questions (FAQs)
Q1: How long does it take to brew a batch of beer?
A1: A typical extract brew day takes about 3-4 hours. Fermentation usually takes 1-2 weeks, and bottle conditioning adds another 2-3 weeks. So, from start to a drinkable beer, expect about 3-5 weeks.
Q2: What’s the most important thing to get right in homebrewing?
A2: Sanitation. Without proper sanitation, you risk infecting your beer with bacteria or wild yeast, leading to off-flavors and spoilage.
Q3: Can I really make good beer with just a few basic items?
A3: Absolutely! A 5-gallon kettle, a fermenter, sanitizer, and some basic tools are all you need for extract brewing. Many award-winning beers have been brewed with minimal equipment.
Q4: My beer tastes like cardboard. What went wrong?
A4: This is usually a sign of oxidation. You might be splashing the beer too much during transfers, or it could be exposed to air during bottling. Handle your beer gently after fermentation.
Q5: How do I know when fermentation is finished?
A5: The most accurate way is to take gravity readings with a hydrometer. When the readings are stable for 2-3 consecutive days, fermentation is complete. Visible airlock activity can be an indicator but isn’t always definitive.
Q6: Is it safe to drink homebrewed beer?
A6: Yes, as long as you follow good sanitation practices and brewing procedures. The alcohol produced by yeast is safe, and the fermentation process itself doesn’t create harmful byproducts when done correctly.
Q7: What is “trub”?
A7: Trub is the sediment left at the bottom of your brew kettle after boiling (hops, proteins, etc.) and the sediment at the bottom of your fermenter (spent yeast and proteins). It’s important to leave this behind when transferring your beer.
Q8: How much does it cost to start homebrewing?
A8: A basic starter kit for extract brewing can range from $100-$200. Ingredient costs per batch are typically $30-$50 for a 5-gallon batch, depending on the ingredients used.
Embarking on your homebrewing journey is an adventure filled with learning, experimentation, and ultimately, delicious rewards. Don’t be intimidated; start simple, stay clean, be patient, and enjoy the process. Your first homebrewed pint will be one of the most satisfying drinks you’ve ever tasted. Happy brewing!